Install Apex 4.2 on Glassfish4 Server
Posted: January 22, 2015 Filed under: Application Express (APEX), Oracle | Tags: APEX, Glassfish4, Oracle Linux, Oracle REST Services, Oracle XE 1 CommentThis is my third time of writing how to install Apex, and each time there is a new element to the installation, much of it is the same, but there are some areas that are not documented or just a little bit vague.
To complicate matters a little, I installed this on Oracle Linux, you would have though Oracle OS, Oracle Database and Oracle development studio would go hand in hand!!!
So as always you need to start with the base OS, this is just point and go, there really was no configuration on the Linux side to do.
The versions and stats for the install
Oracle Linux – Oracle Linux Server release 7.0
Kernel – 3.8.13-55.1.2.el7uek.x86_64
Database – XE 11.2.0
Apex – 4.2.6
Glassfish – 4.1
Apex Listener (now Oracle restful services 2.0)
Java JDK – java version “1.8.0_25”
One note that drove me mad for a day.
After thinking my config was wrong it dawned on me that it was the firewall, I normally suspect this and issue the normal command service iptables stop
I use this mainly just to get us working and then refine the rules later.
SO
service iptables stop
Redirecting to /bin/systemctl stop iptables.service
Failed to issue method call: Unit iptables.service not loaded.
You would therefore think that there is no firewall, HOW wrong was I!!!!!!
Oracle Linux has adopted the systemd method of startup and dropped init.d
A quick command
systemctl list-unit-files
Showed the firewall service enabled
systemctl stop firewalld.service
You will need to read up on systemd as I will now start too. But this will get you a trouble free install to start with.
mkdir /opt/software
cd /opt/software
You will need to download the following :-
http://www.oracle.com/technetwork/developer-tools/apex/downloads/index.html
https://glassfish.java.net/download.html (I downloaded the web version)
http://www.oracle.com/technetwork/developer-tools/rest-data-services/downloads/index.html
OK now let’s start
yum install unzip libaio
unzip oracle-xe-11.2.0-1.0.x86_64.rpm.zip
cd /opt/software/Disk1
rpm -i oracle-xe-11.2.0-1.0.x86_64.rpm
You will probably get this error
ERROR
/var/tmp/rpm-tmp.ijRawr: line 186: bc: command not found
yum install bc

rpm -e oracle-xe-11.2.0-1.0.x86_64
There is a good chance that you will then run into this area
This system does not meet the minimum requirements for swap space. Based on the amount of physical memory available on the system, Oracle Database 11g Express Edition requires 2048 MB of swap space. This system has 1639 MB
of swap space. Configure more swap space on the system and retry the installation.
error: %pre(oracle-xe-11.2.0-1.0.x86_64) scriptlet failed, exit status 1
error: oracle-xe-11.2.0-1.0.x86_64: install failed
swapoff -a
rm -f /swapfile
dd if=/dev/zero of=/swapfile bs=2048 count=2097152
/sbin/mkswap /swapfile
/sbin/swapon /swapfile
/sbin/swapon -s
Now edit the fstab so that the existing swapfile is not mounted
vi /etc/fstab
#/dev/mapper/ol-swap swap swap defaults 0 0
cd /opt/software/Disk1
rpm -i oracle-xe-11.2.0-1.0.x86_64.rpm
Once installed you will get the following message
Executing post-install steps…
You must run ‘/etc/init.d/oracle-xe configure’ as the root user to configure the database.
OK before we try to configure the database there are a few errors that may occur if you do not follow the next commands.
For this example my server is called APEX01
To avoid this error
Specify the HTTP port that will be used for Oracle Application Express [8080]:
/etc/init.d/oracle-xe: line 362: netstat: command not found
Specify a port that will be used for the database listener [1521]:
/etc/init.d/oracle-xe: line 405: netstat: command not found
yum install net-tools
There are several issues that can cause this the host file and the hostname may need changing.
The hostname needs to be in the host file
I installed this on the Oracle linux and therefore the host was called localhost
We are going to name the server apex01
vi /ect/hostname
apex01
We now need to populate the hosts file so that the server knows where to find itself.
echo "127.0.0.1 apex01" >> /etc/hosts
echo "IP ADDRESS OF SERVER apex01" >> /etc/hosts
Rebooting is a safe bet here
OK now to configure Oracle
/etc/init.d/oracle-xe configure
Oracle Database 11g Express Edition Configuration
————————————————-
This will configure on-boot properties of Oracle Database 11g Express
Edition. The following questions will determine whether the database should
be starting upon system boot, the ports it will use, and the passwords that
will be used for database accounts. Press <Enter> to accept the defaults.
Ctrl-C will abort.
Specify the HTTP port that will be used for Oracle Application Express [8080]:Enter
Specify a port that will be used for the database listener [1521]:Enter
Specify a password to be used for database accounts. Note that the same
password will be used for SYS and SYSTEM. Oracle recommends the use of
different passwords for each database account. This can be done after
initial configuration:Enter Password
Confirm the password:Enter Password
Do you want Oracle Database 11g Express Edition to be started on boot (y/n) [y]:y
Starting Oracle Net Listener…Done
Configuring database…
To test the connection
ln -s /u01/app/oracle/product/11.2.0/xe/bin/sqlplus /usr/bin/sqlplus
If you ran sqplus from the command line you would get the following error
P2-0667: Message file sp1<lang>.msb not found
SP2-0750: You may need to set ORACLE_HOME to your Oracle software directory
To correct this you need to set the ORACLE_HOME
vi /etc/profile
Insert the following lines at the bottom
export ORACLE_HOME=/u01/app/oracle/product/11.2.0/xe
export ORACLE_HOMEexport ORACLE_SID=XEexport NLS_LANG=AMERICAN.AL32UTF8
export PATH=$PATH:$ORACLE_HOME/bin
You need to run the profile to get the variables
. /etc/profile
Note the space between . /
It is also worth adding these lines to the .bashrc file in the home directory
echo $ORACLE_HOME
This will see if you have set the directory correctly
To see if you have Oracle working correctly then:
sqlplus sys@localhost as sysdba
Enter the password that you set at the start of the installation
This should give you a SQL> prompt
select sysdate from dual;
This will return today’s date
We need to change some parameters in Oracle
sqlplus sys/password@localhost as sysdba
ALTER SYSTEM SET SHARED_POOL_SIZE='100M' SCOPE=spfile;
exit
service oracle-xe restart
We need to return to some Oracle configuration later.
Time to install the java-jdk
cd /opt/software
rpm -i jdk-8u25-linux-x64.rpm
Now to get Apex installed
unzip apex_4.2.6_en.zip
cd /opt/software/apex
sqlplus sys/password@localhost as sysdba
The creation of this environment will be based on the table space being called apex, so we need to create the relevant tables space.
So at the SQL> prompt
create tablespace apex
 logging
 datafile '/u01/app/oracle/oradata/XE/apex.dbf'
 size 32m
 autoextend on
 next 32m maxsize 2048m
 extent management local;
To actually install Apex, the command we will use is as follows :-
@@apexins tablespace_apex tablespace_files tablespace_temp images
So in our example we will use
@@apexins apex apex temp /i/
This will take around 60 minutes to install, depending on the size of your server.
Now we will set the password for the admin of the site
@apxchpwd
Enter a password for the ADMIN user Enter admin password that you want
We now need to set the passwords for some internal apex user accounts
@apex_rest_config.sql
ALTER USER APEX_PUBLIC_USER ACCOUNT UNLOCK;
ALTER USER APEX_LISTENER ACCOUNT UNLOCK;
The password expires,to prevent this behavior, create another profile in which the PASSWORD_LIFE_TIME
parameter is set to unlimited and alter the APEX_PUBLIC_USER and APEX_LISTENER accounts and assign it
to the new profile.
CREATE PROFILE unlimited_access LIMIT
 PASSWORD_LIFE_TIME UNLIMITED
 PASSWORD_REUSE_TIME UNLIMITED
 PASSWORD_REUSE_MAX UNLIMITED
 PASSWORD_VERIFY_FUNCTION null
 PASSWORD_LOCK_TIME UNLIMITED
 PASSWORD_GRACE_TIME UNLIMITED;
alter user APEX_PUBLIC_USER profile unlimited_access;
alter user APEX_LISTENER profile unlimited_access;
This is from the Installation guide and requires executing if you want to access Apex
“Granting Connect Privileges
The following example demonstrates how to grant connect privileges to any host for
the APEX_040200 database user. This example assumes you connected to the
database where Oracle Application Express is installed as SYS specifying the SYSDBA
role.”
DECLARE
ACL_PATH VARCHAR2(4000);
BEGIN
-- Look for the ACL currently assigned to '*' and give APEX_040200
-- the "connect" privilege if APEX_040200 does not have the privilege yet.
SELECT ACL INTO ACL_PATH FROM DBA_NETWORK_ACLS
WHERE HOST = '*' AND LOWER_PORT IS NULL AND UPPER_PORT IS NULL;
IF DBMS_NETWORK_ACL_ADMIN.CHECK_PRIVILEGE(ACL_PATH, 'APEX_040200',
'connect') IS NULL THEN
DBMS_NETWORK_ACL_ADMIN.ADD_PRIVILEGE(ACL_PATH,
'APEX_040200', TRUE, 'connect');
END IF;
EXCEPTION
-- When no ACL has been assigned to '*'.
WHEN NO_DATA_FOUND THEN
DBMS_NETWORK_ACL_ADMIN.CREATE_ACL('power_users.xml',
'ACL that lets power users to connect to everywhere',
'APEX_040200', TRUE, 'connect');
DBMS_NETWORK_ACL_ADMIN.ASSIGN_ACL('power_users.xml','*');
END;
/
COMMIT;
You should get the message
PL/SQL procedure successfully completed.
SQL>
Commit complete.
There are other areas of Oracle that need manipulation, again taken from the install guide.
To find the job_queue_processes
SELECT VALUE FROM v$parameter WHERE NAME = 'job_queue_processes';
To set the value
ALTER SYSTEM SET JOB_QUEUE_PROCESSES = 40;
Once the user and passwords and connection grants have been set we can exit from the SQL> screen
exit
Now we need to setup the Glassfish element.
cd /opt/software
unzip glassfish-4.1.zip
mv glassfish4 /opt/
cd /opt/glassfish4
Note sure what the score is here, but from previous notes on the install, it appears that if you delete the domain and recreate it, it limits the possibility of errors occurring ????
./asadmin delete-domain domain1
./asadmin create-domain domain1
Enter admin user name [Enter to accept default “admin” / no password]>admin
Enter the admin password [Enter to accept default of no password]>glasspassword
Enter the admin password again>
You should be presented with the following message :-
Using default port 4848 for Admin.
Default port 8080 for HTTP Instance is in use. Using 54137
Using default port 7676 for JMS.
Using default port 3700 for IIOP.
Using default port 8181 for HTTP_SSL.
Using default port 3820 for IIOP_SSL.
Using default port 3920 for IIOP_MUTUALAUTH.
Using default port 8686 for JMX_ADMIN.
Using default port 6666 for OSGI_SHELL.
Using default port 9009 for JAVA_DEBUGGER.
Distinguished Name of the self-signed X.509 Server Certificate is:
[CN=apex01,OU=GlassFish,O=Oracle Corporation,L=Santa Clara,ST=California,C=US]
Distinguished Name of the self-signed X.509 Server Certificate is:
[CN=apex01-instance,OU=GlassFish,O=Oracle Corporation,L=Santa Clara,ST=California,C=US]
Domain domain1 created.
Domain domain1 admin port is 4848.
Domain domain1 admin user is “admin”.
Command create-domain executed successfully.
Now we have it installed lets try to start the server and get the other bits configured
cd /opt/glassfish4/bin/
./asadmin start-domain
Hopefully you should get a message on screen
Waiting for domain1 to start ……
Successfully started the domain : domain1
domain Location: /opt/glassfish4/glassfish/domains/domain1
Log File: /opt/glassfish4/glassfish/domains/domain1/logs/server.log
Admin Port: 4848
Command start-domain executed successfully.
Just to test
Navigate to http://FQDN:4848 (where FQDN is your server name)
Login with the credentials that you specified when creating the domain
When you try to log in you will get this message
“Secure Admin must be enabled to access the DAS remotely.”
To remove this is issue you must enable remote access.
cd /opt/glassfish4/bin
./asadmin
Use “exit” to exit and “help” for online help.
asadmin> get secure-admin.enabled
Enter admin user name> admin
Enter admin password for user “admin”>
secure-admin.enabled=false
Command get executed successfully.
asadmin> enable-secure-admin
Enter admin user name> admin
Enter admin password for user “admin”>
You must restart all running servers for the change in secure admin to take effect.
Command enable-secure-admin executed successfully.
asadmin> stop-domain
Waiting for the domain to stop ….
Command stop-domain executed successfully.
asadmin> start-domain
Waiting for domain1 to start ……
Successfully started the domain : domain
domain Location: /u01/app/glassfish4/glassfish/domains/domain1
Log File: /u01/app/glassfish4/glassfish/domains/domain1/logs/server.log
Admin Port: 4848
Command start-domain executed successfully.
asadmin> exit
Try to log in again
If you are successful we need to add the Apex element of the installation
cd /opt/glassfish4/bin
./asadmin stop-domain
mkdir -p /opt/glassfish4/glassfish/domains/domain1/docroot/i
cp -r /opt/software/apex/images/* /opt/glassfish4/glassfish/domains/domain1/docroot/i
cd /opt/software
mkdir /opt/ords
mv ords.2.0.10.289.08.09.zip /opt/ords
cd /opt/ords
unzip ords.2.0.10.289.08.09.zip
Now to do a little configuration
One of the questions will be what is the database SID, if you are unsure then
sqlplus sys@localhost as sysdba;
select sys_context('userenv','db_name') from dual;
Because this is the XE database the SID is XE
OK this is an important bit, you will get you application working without doing this but the config files will end up in /tmp/apex, so issue the configdir command ensure you keep your files is a safe place.
mkdir /opt/apex
java -jar ords.war configdir /opt/apex
java -jar ords.war
Jan 21, 2015 2:27:07 PM oracle.dbtools.common.config.file.ConfigurationFolder logConfigFolder
INFO: Using configuration folder: /tmp/apex
Enter the name of the database server [localhost]:Enter
Enter the database listen port [1521]:Enter
Enter 1 to specify the database service name, or 2 to specify the database SID [1]:1
Enter the database SID [xe]:XE
Enter the database user name [APEX_PUBLIC_USER]:Enter
Enter the database password for APEX_PUBLIC_USER:Enter the password set previously
Confirm password:
Enter 1 to enter passwords for the RESTful Services database users (APEX_LISTENER,APEX_REST_PUBLIC_USER), 2 to use the same password as used for APEX_PUBLIC_USER or, 3 to skip this step [1]:2
Jan 21, 2015 2:39:39 PM oracle.dbtools.common.config.file.ConfigurationFiles update
INFO: Updated configurations: defaults, apex, apex_al, apex_rt
Enter 1 if you wish to start in standalone mode or 2 to exit [1]:2
OK now we need to compile a war file, this file will be called i.war
java -jar ords.war static /opt/glassfish4/glassfish/domains/domain1/docroot/i
WAR Generation complete
WAR location : /opt/ords/i.war
Context path : /i
Static resources : /opt/glassfish4/glassfish/domains/domain1/docroot/i
Ensure the static resources are available at path: /opt/glassfish4/glassfish/domains/domain1/docroot/i
We are now ready to deploy the two packages i.war and ords.war
Navigate to http://FQDN:4848 (where FQDN is your server name)
Login with the credentials that you specified when creating the domain

You need to set the “Default Principal To Role Mapping” to enabled

Don’t forget to press the save button
This is from the Apex install guide
From the web console.
Select the realm to which to add your user (for example, file).
The Edit Realm page appears.
On the Edit Realm page, click the Manage Users button.

The File Users page appears.
On the File Users page, click New.

The New File Realm User page appears.
On the New File Realm User page, create an Admin user:
User ID – Enter the name of the Oracle Application Express Listener administrator:
User ID: adminlistener
Group List – Enter the role to which the user belong:
Group List: Admin
New Password – Enter a unique password.
Confirm New Password – Enter the password again.
Click OK.

Repeat the previous steps and create another user for the Oracle Application Express Listener manager, by specifying the following:
User ID: managerlistener
Group List: Manager
Click OK.

You should end up with two file users

Installation and configuration of applications
We now need to install the Oracle Rest Service that we downloaded earlier on and also the i.war that we compiled
On the navigation tree, click the Application node.
The Applications page displays.
Click the Deploy button.
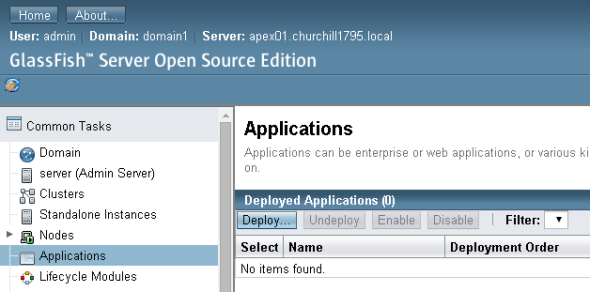
The Deploy Applications or Modules page displays.
Choose the “Local Packaged File or Directory That Is Accessible from GlassFish Server”
Enter the location of the odrs.war file, in our configuration that is /opt/ords/odrs.war
Type – Web Application
Context Root – odrs
Application name – odrs
Check enabled for everything
Description – Apex Listener

You need to deploy i.war in the same way
Enter the location of the odrs.war file, in our configuration that is /opt/ords/i.war
Type – Web Application
Context Root – NOTE THAT THIS NEEDS TO BE BLANK
Application name – i
Check enabled for everything
Description – Apex

Access Oracle Application Express Listener Administration
Once you have completed the above steps and uploaded the odrs.war and i.war file you can now launch the application.
If all is OK you will be able to launch the apex development environment at
OK you should see a login screen.
We need to create some users and a workspace to start our development.

More about how you use Apex and workspace in the next post.
Starting an Oracle XE listener on Amazon EC2 instance
Posted: July 29, 2012 Filed under: XE | Tags: Amazon AWS, EC2, Oracle XE 1 CommentI have written a few posts regarding getting Oracle listener working on Oracle, I though I would post and independent piece of writing regarding this subject.
I have installed Oracle 11 express version, there are two ways to get Oracle working. The issue is that every time that you reboot an Amazon instance you will get a new IP address and name. When you create Oracle for the first time it uses the server name in the .ora files. This means that when you reboot the server the Oracle listener will fail to start.
Modify the listener.ora and tnsnames.ora files to contain a stack name for the serve and then map the static name to an ever changing host file where the information is inserted when the service is started. The other way is to register the server with Amazons route 53 service. This would allow you to set a FQDN in the two files and when the server is restarted it would work.
As I use more of Amazon AWS then I am starting to use Route 53 even more, but if you just want to get Oracle working without the added expense of Route 53 then the below solution will work.
Modify the tnsnames.ora file
vi /u01/app/oracle/product/11.2.0/xe/network/admin/tnsnames.ora
My tns file looks like this
# tnsnames.ora Network Configuration File:
XE =
(DESCRIPTION =
(ADDRESS = (PROTOCOL = TCP)(HOST = servername)(PORT = 1521))
(CONNECT_DATA =
(SERVER = DEDICATED)
(SERVICE_NAME = XE)
)
)
EXTPROC_CONNECTION_DATA =
(DESCRIPTION =
(ADDRESS_LIST =
(ADDRESS = (PROTOCOL = IPC)(KEY = EXTPROC_FOR_XE))
)
(CONNECT_DATA =
(SID = PLSExtProc)
(PRESENTATION = RO)
)
)
This is a read only file so you will need to use
:wq!
To save the file
You also need to change the listener.ora file as this also contains the host name of the server.
vi /u01/app/oracle/product/11.2.0/xe/network/admin/listener.ora
My file looks like this
# listener.ora Network Configuration File:
SID_LIST_LISTENER =
(SID_LIST =
(SID_DESC =
(SID_NAME = PLSExtProc)
(ORACLE_HOME = /u01/app/oracle/product/11.2.0/xe)
(PROGRAM = extproc)
)
)
LISTENER =
(DESCRIPTION_LIST =
(DESCRIPTION =
(ADDRESS = (PROTOCOL = IPC)(KEY = EXTPROC_FOR_XE))
(ADDRESS = (PROTOCOL = TCP)(HOST = servername)(PORT = 1521))
)
)
DEFAULT_SERVICE_LISTENER = (XE)
This is a read only file so you will need to use
:wq!
To save the file
You need to create the following file, to recreate the hosts file every time the server is rebooted, this will allow the oracle to work properly.
The script file I called createhostfile.ksh and the contents is
#!/bin/bash
getip=`/sbin/ifconfig eth0 | grep ‘inet addr’ | awk ‘{print $2}’ | sed -e ‘s/.*://’`
newhost=”${getip} servername“
rm -f /etc/hosts
echo “127.0.0.1 localhost localhost.localdomain” > /etc/hosts
echo $newhost >> /etc/hosts
Note that server name must match what is used in the tnsnames and listener ora files.
To create the file
mdir /opt/scripts
cd /opt/scripts
vi createhostfile.ksh
paste the script above
chmod 755 createhostfile.ksh
Now we can change the oracle-xe file that is used to start and stop oracle.
vi /etc/init.d/oracle-xe
After all of the comment insert the following line
/etc/createhostfile.ksh
This will call the host file creating every time that oracle is started

